Monday 28 December 2015

Flooring

First I measured the DWL with a laser level. Then I started attaching the floor bearing strips regarding to DWL.
DWL level measured with a laser level


Working time been invested: 1770 hours

Sunday 13 December 2015

Rudder Blade Fitted to Rudder Box

Rudder Blade and Rudder Box are largely completed since two years. Since then I know that the rudder blade clamps in the box.
Today I went to the problem. I used a copper-pipe and a plywood sheet pasted up with sandpaper to widen the slit. There were three hours of work up to success.


Saturday 12 December 2015

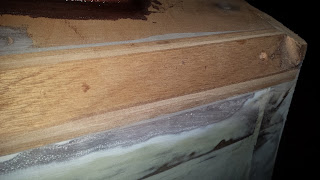
Stowage Hatch Coaming


Starboard hatch coaming glued to deck
The stowages at stern should be accessible from deck. Therefore I opened the deck on starboard and portside and framed the openings with hatch coamings.
Portside hatch coaming after planing and sanding


Friday 4 December 2015

Stainless Steel Works

The stainless steel work for rudder gudgeons and keel lifting fittings gave away to a professional locksmith. The result is very nice to look at, but it was not that cheap.


Saturday 21 November 2015

Plywood-Capping on Sheer

The left photo shows the sheer after planing and sanding.


The right photo shows the plywood-capping temporarily fixed by screws. 


Plywood capping planed and sanded
Detail view of the sheer construction


As soon as it gets warmer, I will attach another plywood layer. Finally I plan to attach a sheer rail from teak on top.

Saturday 31 October 2015

Smoothing Bumps

I discovered bumps on port-side and starbord-side deck, about two meters aft from stem. In order to smooth them I doubled up the foredeck by 4 to 10 mm.

Sunday 18 October 2015

Friday 2 October 2015

Cabintop Primed

After the HIGH BUILD EPOXY FILLER has been sanded and washed, I applied the next layer. I decided for EPOXY HB COAT from Epifanes. On the uniformly gray surface now all the little bumps come to the fore. In particular, the Chines don't look very fine. I'll have to sand and fill them at least one more time.


Saturday 26 September 2015

Cabintop Filled


The cabintop is filled with one layer HIGH BUILD EPOXY FILLER from Yachtcare

Thursday 24 September 2015

Cabintop Glass Coated


Glass coating of the cabintop has been finished. My wife just smothing the last piece of peel ply.


Sunday 9 August 2015

Cabintop is Tight

I opened the hole for the hatch, because it was pitch dark in the cabin. I already needed a headlamp for the last tasks !


Tuesday 28 July 2015

Building the Cabintop

For building the cabintop I couldn't relate on Dudley Dix's drawings, because I changed the hight to gain more headroom. Therefore I fitted the panels step by step to the bulkheads. In order to get harmonic bending curves I used 20x20 mm² spline-battens. Before glueing I aligned and fixed the panels with help of nail-plates.

Illustration of building the cabintop in five steps


In a first step the roof panel has been glued over the bulkheads. The 20x20 mm² spline-battens helped to achieve a harmonic bending of the panel. 
In a second step the side panel was fixed with nail-plates temporarily. Another spline-batten was used to define the chine curve.


After cutting the chine curve the panel was glued and fixed with nail-plates until the epoxi has set.


Cabintop after step 4 has been accomplished

Cabintop after step 5 has been accomplished


Thursday 2 July 2015

Statistics

It is clear and obvious that I achieve more in summer than in winter.
In summer I can work longer in the evening due to the longer daylight.
In winter the progress is slowed down by low temperatures and darkness in the evenings.
Now that I've already worked more than 1,500 hours on the boat, I wanted to determine the difference between summer and winter times quantitatively.

It turns out:
  • From September to April I worked on average 23 hours per month.
  • From May to August I worked on average 46 hours per month.

Wednesday 1 July 2015

Deck and Cabin under Progress

Since my last post I worked 64 hours but the visible progress is not that giant.
But I've done a lot.
I filled the scoop, painted the aft stowages, worked on the cockpit, scarfed deck stringers, started closing the deck and the cabin.


Working time been invested: 1566 hours 

Thursday 14 May 2015

1500 Hours Working Time Completed

The turning wheels have served its purpose and be dismantled. I used some parts of the wheels to jack the hull.


Dismantled turning wheels.
The hull is filled with one layer HIGH BUILD EPOXY FILLER. The second layer follows after deck and sheer are finished.


Sunday 26 April 2015

Filling the Hull

For a first attempt I filled the starboard aft hull. I used YACHTCARE HIGH BUILD EPOXY FILLER. The handling was easy and went off without making stains. But the result looks different to what the promotion video shows. 
The reason is probably the very rough surface due to the removed peel ply. It sucks all the filler on. Maybe a second layer is required.
Starboard aft has been filled with YACHTCARE HIGH BUILD EPOXY FILLER

Friday 24 April 2015

Crafting the Pocket for the Teflon Glide Block

Into the forward bottom edge of the keel foil slot a Teflon glide block has to be fitted.

I machined the required pocked by using a BOSCH oscillating multi-tool


To cover the pocket surface with glass fabric I used a wood block as mould. The mould block is wrapped with plastic-foil in order to be removed after the epoxi has set.
In a last step all is faired and covered with a epoxy-copper mixture